


The beauty of Aras Innovator is the ability to easily create and connect external applications to handle data within your environment. One useful use case, for example, could be handling shop floor problems where shop engineers may need to take a pictures, add some location data associated with the shop, and some information as to what may be wrong.
In this blog post we will be taking a look at such an application, the PWA (Progressive Web Application) Problem Reporter, available to download and use via the Aras Labs github. We will go over the installation and use of this application following the installation instructions provided with the README.
IIS Configuration:
Keep in mind that this PWA is currently supported only by Innovator 12 and up. The Problem Reporter also utilizes another JavaScript library in order to handle the location features for reports. Depending on whether or not this feature is necessary for your organization, the following pre-requisites are needed:
- Aras Package Import Utility (found along with Innovator CD image)
- PWA-sample-app import packages in the repository
- Code Tree files found in the repository as well
Lets begin by setting up IIS for the new application:
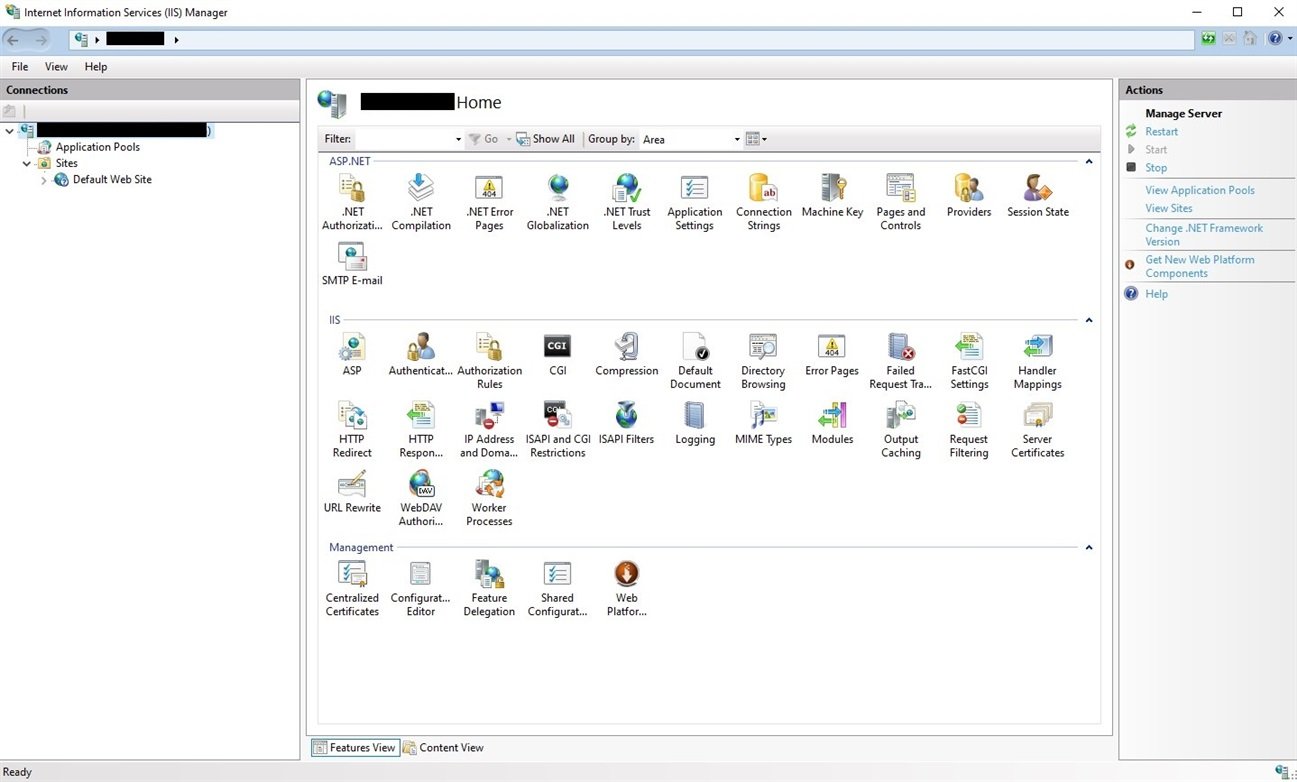
- Hit the windows key on your machine and type in Internet Information Services (IIS) Manager and hit enter to open the application. This is the application that will open:
- On the left hand side, under Connections, click the dropdown (machines name) > sites > Default Web Site.
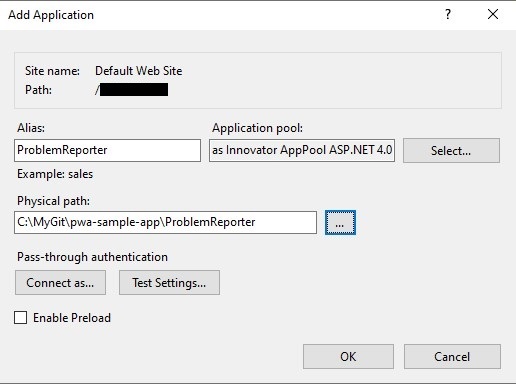
- Within Default Web Site dropdown right click on the innovator web alias you will be using with the reporter app and select Add Application from the new dropdown.
- This will bring up a popup dialog; use ProblemReporter as the new application’s alias in the Add Application dialog. This will be serve as the name of our application within the URL.
- Select the physical path to the git repository > Problem Reporter then click ok.
- Click Restart, to restart IIS, on the right side under the Actions menu box. If there is no option for restart you may need to click on the machines name on the left side under Connections which will switch the context and bring up Manage Server under the Actions menu box on the right hand side of the application.
Client Registry Configuration:
In order to allow Aras Innovator authentication we will need to configure Oauth server:
- Open up the directory of your Aras Innovator installation, default directory is in C:\Program Files(x86)\Aras\Innovator.
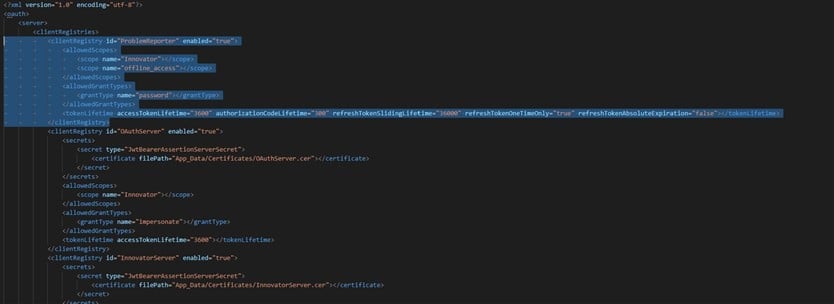
- Within the root directory go to OAuthServer then open up the OAuth.config file.
- Under the clientRegistries tags we will be add the following and save/close the file:

Run another IIS restart, step 6 of the IIS Configuration instructions above, before proceeding. Your OAuth.config file should look like this at the end:
Location Configuration Settings:
In some cases there are multiple shop floors in different locations and not limited to a single shop. In this case the location feature would be useful, but not necessary for setup. Please note that the PWA would still work without this configured:
- First we need to create an account for a JavaScript library called MapBox to display the location data as a map on the form. Go to the Mapbox sign in and create a free account.
- After signing in go to the account page and copy the access token provided.
- We will then need to go to our repository and open up the CodeTree folder containing an Innovator folder within it.
- Copy the Innovator folder and go to your root Aras Innovator installation directory (root will be the same directory containing the InnovatorServerConfig.xml) and paste the Innovator folder here.
- Next is to import the package found in the repository folder under Import. It is recommended for this next step to take a backup of your database. Run the import tool found in your Aras Innovator CD image in the PackageImportExportUtilities folder > Import > import.exe and point it to the imports.mf file in the repository folder (pwa-sample-app > Import).
- Once this has completed, log into your Aras Innovator instance as admin.
- Go to TOC > Administration > Variables and search for the labs_MapToken item. Open this up, hit edit on the item, and paste the access token provided from the MapBox website.
Finally! You have successfully setup the Problem Reporter Sample PWA and you are good to go! The URL for your application will be the following with your web alias for the Aras Innovator instance you are pointing to: http://localhost/{web alias} /ProblemReporter/.
Any reports you create within the application will be created and found within your Aras Innovator instance under the TOC > Change Management > PRs as well as within the application itself.
Conclusion:
Thank you for following along with our blog post today on configuration of the Problem Reporter PWA application. As one can see connecting external applications to communicate shop information is easily configured through Aras Innovator and IIS. Shop engineers can now easily send more information from different locations through a tablet or even a mobile device. Let us know below if your organization utilizes their own PWA applications or Aras Labs’ github Problem Reporter application!