

The ability to customize your instance of Aras Innovator is one of its great selling points. You can create your own ItemTypes and Relationships and build incredible functionality on top of them. In addition to that, the ItemTypes which make up Aras’s applications can be edited as well. This allows you to modify any application to better fit your business process. Aras innovator has a packaging feature to let admins take a snapshot of one database's configuration and apply that configuration to another database. This blog will show you how to utilize this feature and package up additions to existing packages, using our cui-add-to-package Community Project.
Background
Package management is an important part of developing for Aras Innovator. Once you’ve made modifications, you’ll probably want to share them across multiple environments, or share them with the Aras community as a community project. I’ve posted a blog about the basics of packaging previously, which I’d recommend reading before diving into this post.
Before we dig into tips to help package your customizations, it's important to understand how the package import tool works. The Aras package import tool takes a package of AML files representing the configuration of one or more Aras Items and applies that configuration to a target database. Typically this means that packaged items that don't exist in the target database will be created. If the packaged item does exist in the target database, any differences will be overwritten with the configuration in the package.
We recommend using the "merge" option when importing Aras packages. When "merge" is selected, the import tool will overwrite the target database's configuration if there is a conflict between the package and database. Alternatively, if "ignore" is selected, the import tool will skip over any items in the package that already exist in the database.
Best Practices
Our Example
Here's a concrete example that you might encounter. Jen is updating the labels of a few properties on the Part ItemType to match the terms her end users are familiar with. Marco also needs to update the Part ItemType to add a new color property for another project.
If Marco exports the entire Part ItemType with his new property, he could inadvertently overwrite Jen's new labels. However, if Marco only packages the color property with his project, his package won't overwrite any other changes that Jen or other teammates may have made to the Part ItemType when it's imported.
Solution
Here we'll go over how Marco would go about packaging his singular property, so that he doesn't mess with any of Jen's work. I'll be using the cui-add-to-package Community Project and the screenshots will reflect that.
We'll go ahead and open up the Part ItemType. We can add any property we'd like, but I'll add one called "example" which is just a string variable with a length of 255. The contents aren't important, since the steps are the same regardless.

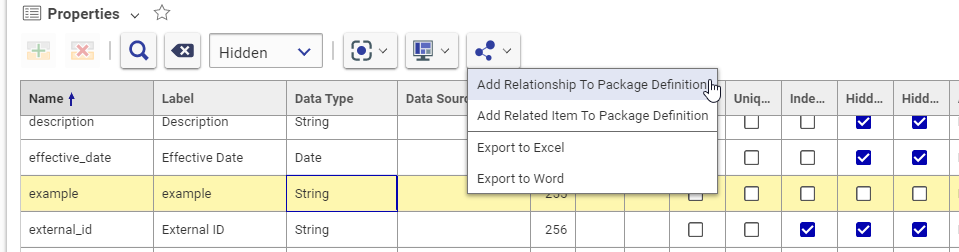
Once we've created the property, we can prepare it for export. We can add our property to a PackageDefinition by using one of the new actions made available by the cui-add-to-package project. Since properties are a null relationship, we'll choose to add the relationship to the PackageDefinition. It is also possible to open the example property and run the action from the property form.
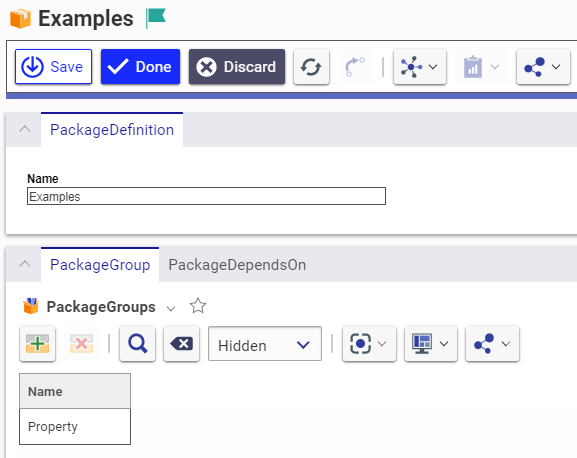
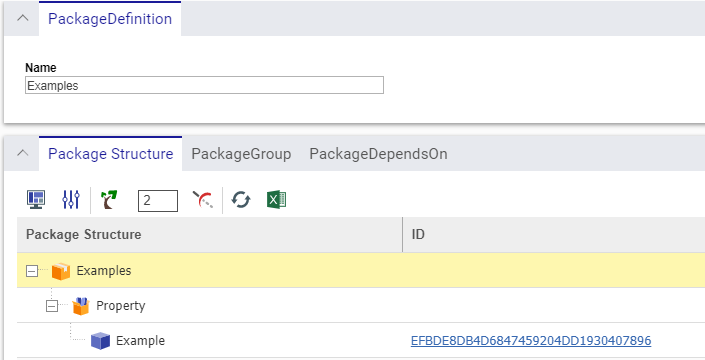
Since this is custom development, we’ll add our changes to a new PackageDefinition “Examples”. The action will automatically create a PackageGroup within our PackageDefintion. If you go to look at your PackageDefinition or PackageGroup, they should look like the screenshots below.
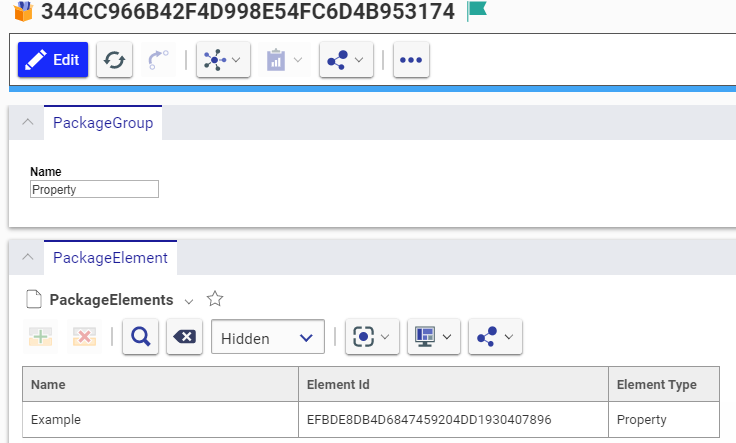
Here's the same PackageDefinition shown using the tree-grid-view-sample project. This shows more clearly how a PackageDefinition is structured.
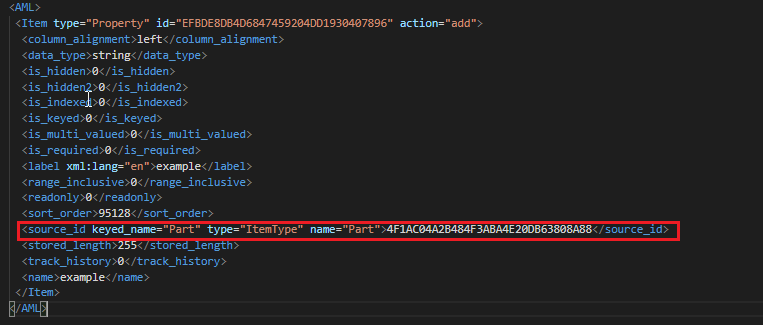
The property item will be added to the PackageDefinition upon export. If we look at the XML which is produced, we can see it is linked to the ItemType by the property "source_id", and therefore will be added back to the correct ItemType on import. The same would apply for any relationship, such as a list value, permission, or TOC Access.
Now that we’ve exported our custom development, we can import it into a different environment and observe the changes. We'll notice that our Property is attached to the correct ItemType, without affecting any other changes which could've been made to that ItemType.
Conclusion
This process does require some extra steps, but it’s the best way to ensure you’re not importing over existing changes. The cui-add-to-package project is the best way to easily add your custom development to a package. Check out the GitHub page here!
We're always looking for more tips related to packaging. What do you do to make the packaging process easier? Let us know in the comments!