


Everyone’s data model is different. You might need connections across ItemTypes that nobody else has ever considered. One way that Aras allows you to do this is by defining what we call Extended Classifications and Extended Properties.
Standard ItemTypes allow for classification. If you have a Part, you can classify into a couple groups, like software, component, assembly, or any custom classification you add. What Xclass allows you to do is create a set of classifications which you could apply to multiple different ItemTypes. This allows you to tag specific items within some overarching group. This makes it really easy to find all the times related to a specific business process, or project, based on the classifications you’ve added.
Extended Properties (xProperties) are defined on a global scale. You’ll create a group of xProperties which we can then assign in a few different ways. We can Implicitly assign them, which means assigning them to a specific xClassification, and will be shared across all items which are classified as such. The other option is to Explicitly assign them, which means we’ll pick specific ItemTypes which our properties will apply to. The example below will Implicitly assign them, using the xClassification structure we define.
Implementing
In this example we’re going to create an xClassification tree, some subclasses, and some xProperties. To do this we’ll first navigate to the Extended Classification section on the table of contents.
Let’s go ahead and create a new xClass. Immediately you are presented with a form. We’ll call our new xClassification tree “Inventory tracking”, as we can group everything related to sales together. Once you’ve filled out the form, you can use the relationships grid to assign which ItemTypes can use your new xClassification tree. We're going to go ahead and configure our xClass to apply to the following ItemTypes.
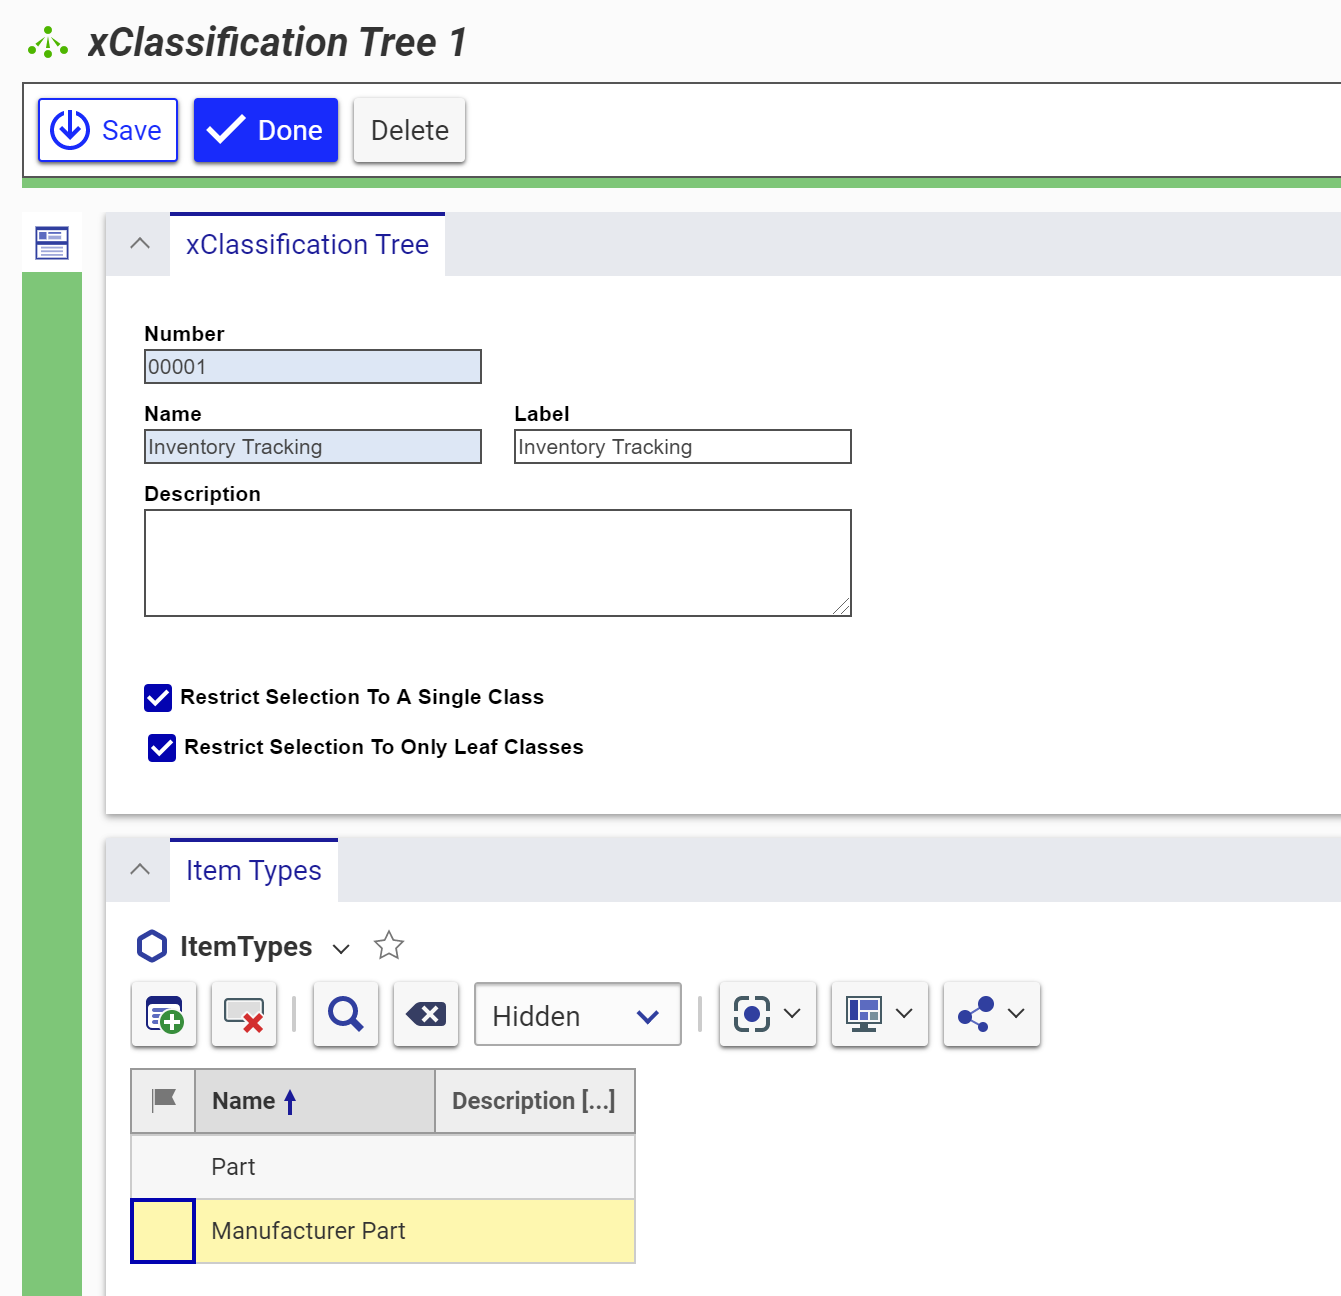
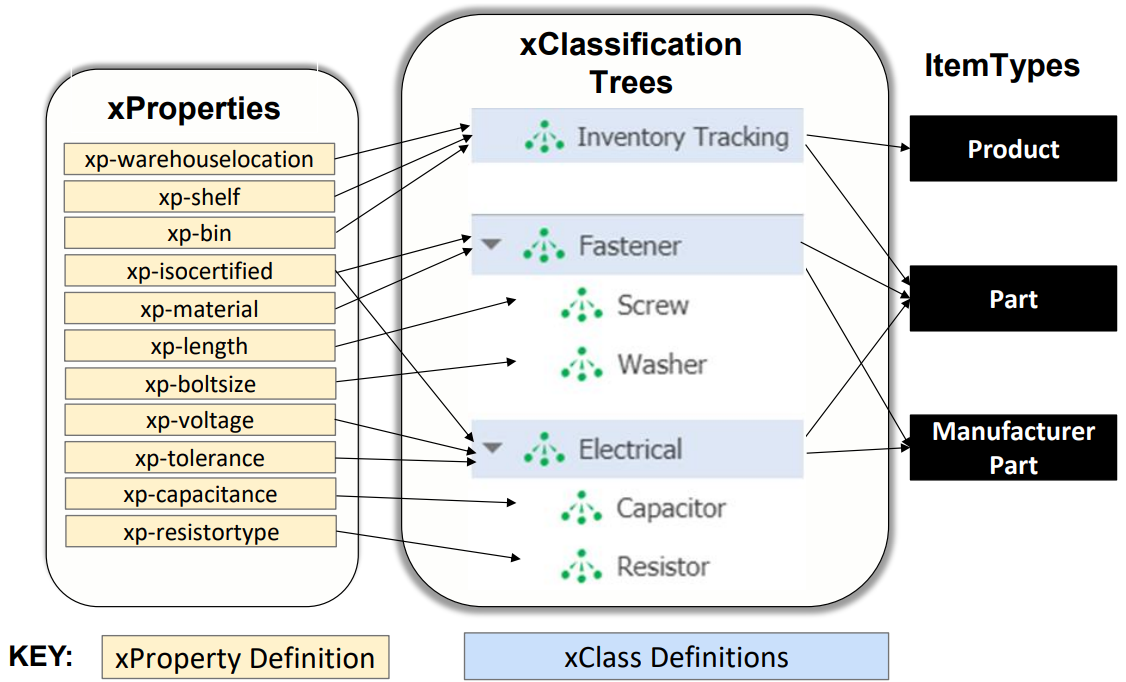
If your curious what the end result could look like, here's a sample structure which could be created from the simple one we will create here.
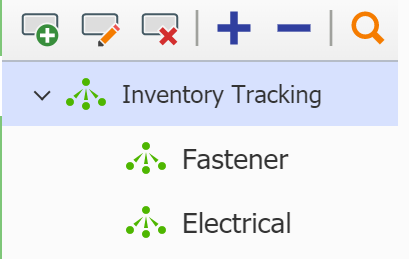
Once you press save, you’re then presented with a new sidebar button. Click it and it will take you to the xClassification Tree editor. This is where we can define the structure of classifications. The pane to the right allows us to define xProperties which correspond to our newly created xClassifications. You can use the left pane to define your xClassification structure. Using the example from the above structure, we'll make our xClass structure look like this:
Once you’ve defined some sub-classifications on the left, select one to assign it some xProperties in the right pane. You can only select from existing xProperties, so I've quickly created xp-material from the diagram above. Here's what the xProperty looks like
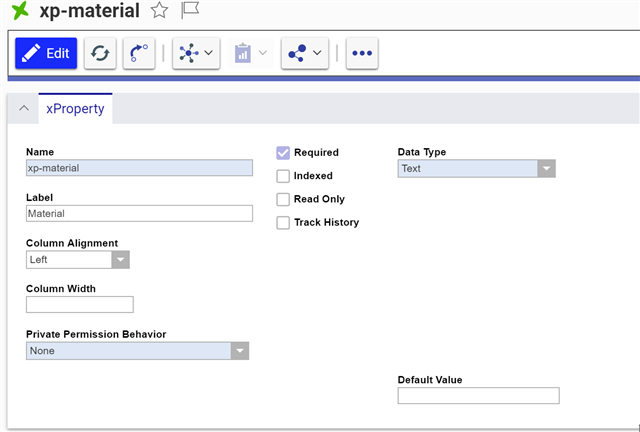
And here's what the editor will look like once we assign our xProperty to our classification.

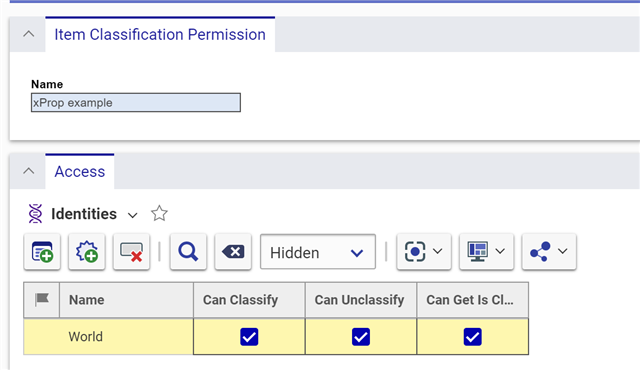
Once you’ve defined some properties, you can save and close the xClassification tree. Our tree will still need a set of permissions. Like everything in Aras Innovator, we use role based permissions to decide who can access, modify, or delete these Items. Without modification, this is set to a permissive option. To modify it, we’ll create a new “Item Classification Permission” Item. Here we can assign different sets of permissions to different identities, similar to how normal permissions are set. The difference is the selections. Here you can choose whether specific identities have the ability to assign classifications, delete classifications, or perform queries about whether items are classified within the related xClassification.
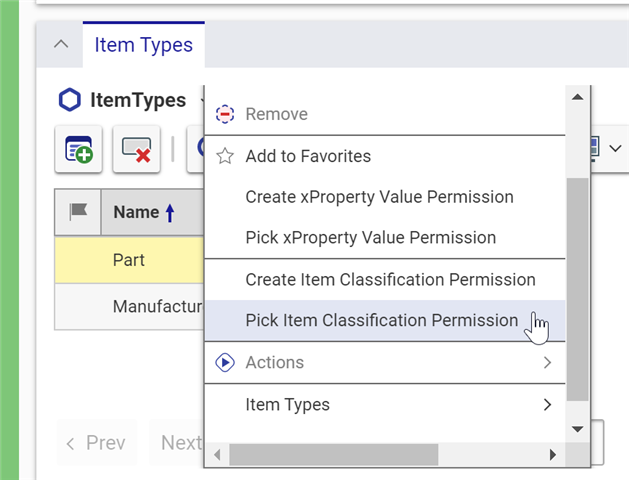
To assign our permission, we must open our classification tree again. The permissions are actually set for each individual relationship in the “types” tab. Right click each individual relationship and you can select “Pick Item Classification Permission”.
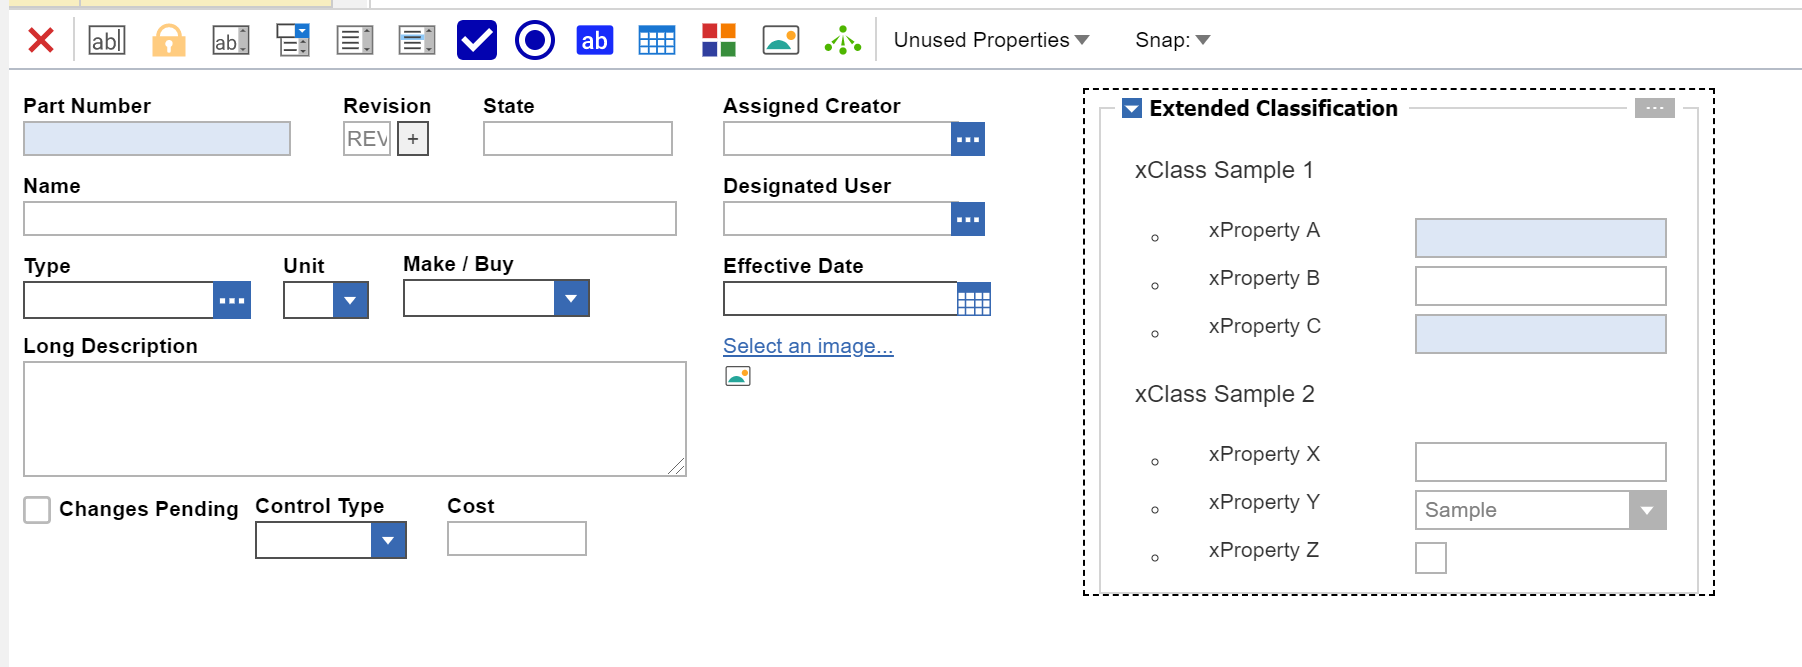
We’re almost done! Our ItemTypes are classified, have xProperties, and have permissions set. The final step is being able to modify the xProperties for an Item through the form. If we open up our custom form, we can add an xClassification box to it. I've added it to the Part Form, as that's where I assigned my custom xClassification. You can see that the box generated only has samples. This is because you can add as many Classifications and Properties as you'd like, and the box will format itself properly.
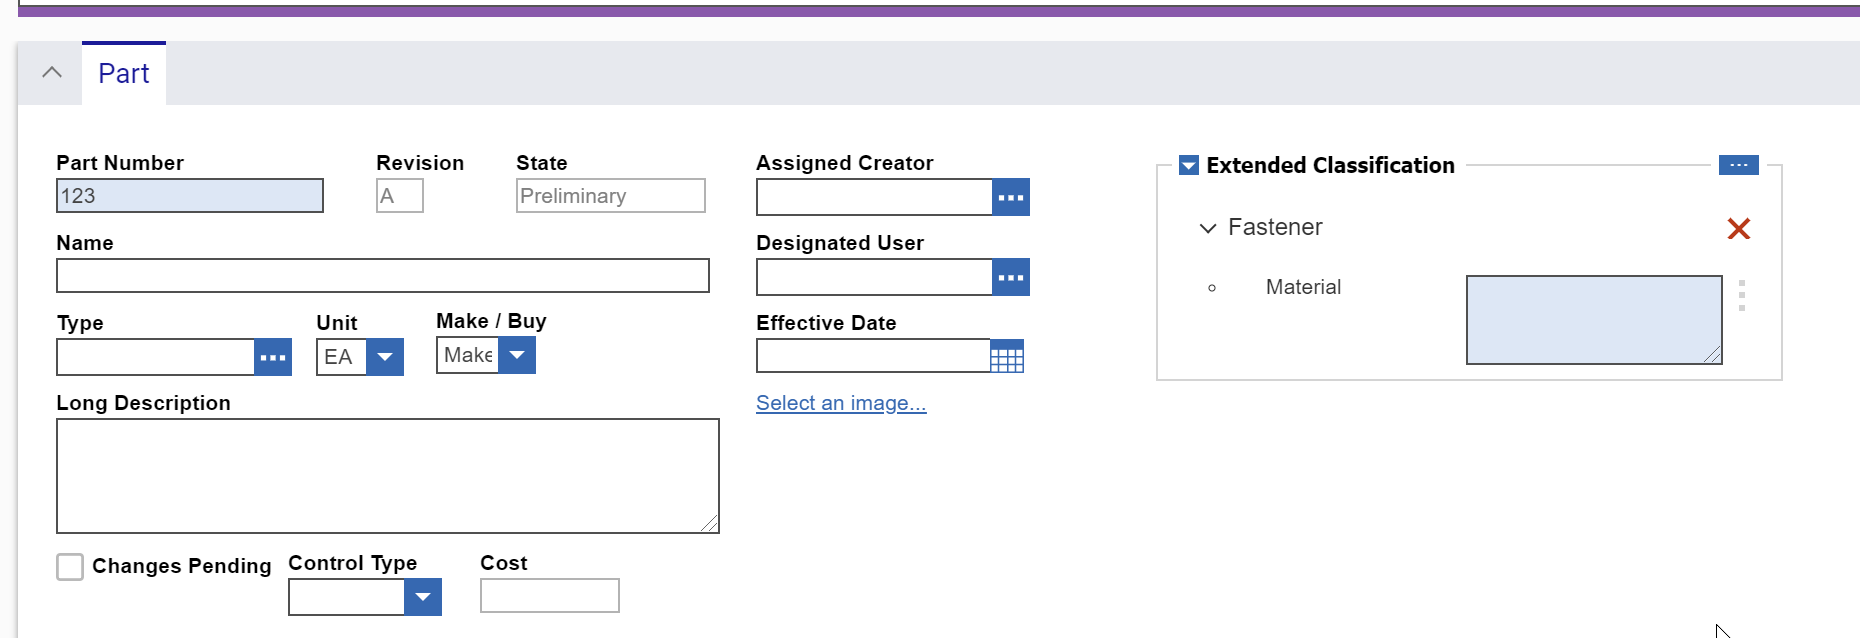
Now once we go to instantiate one of our new items, we will be able to see and modify the associated xProperties.
Conclusion
So now that you know how to assign classifications and xProperties, hopefully you see how they could be used to improve your process. Let us know how you or your organization utilizes this feature in the comments!