


Dynamic Product Navigation or DPN is a great tool created for Aras Innovator SP2 release and up. DPN allows users to view a CAD assembly throughout the various phases of it's life cycle. Included DPN also displays PLM data in context with lightweight CAD viewables, accelerating the design process by providing a more intuitive user experience for anyone who needs access to product information. The 3D viewer generated through a Tree Grid Query displays an entire assembly with each subpart Part BOM item that can be highlighted within the assembly when selected from the side navigation.
Setting up the CAD to PDF Converter:
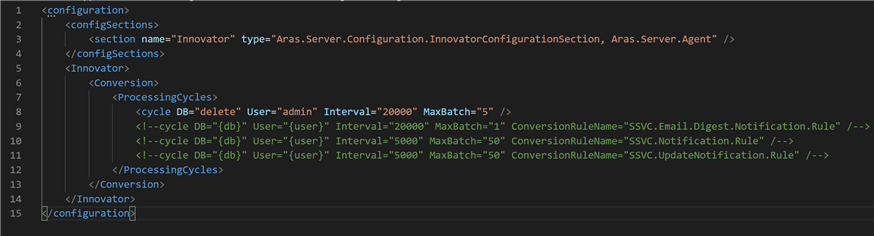
In order to configure DPN to work with your CAD data, one of the prerequisites is setting up the CAD to PDF converter. Our first step will be configuring the agent service with the these tags:
- Go to the root of your Aras Innovator instance and open up the AgentService and the conversion.config file within it
- Uncomment the first cycle tag and replace the placeholder values with your Database name, and admin user:
-
After this change it is necessary to open up Control Panel > Administrative Tools > Services and restart the Aras Innovator Agent for your instance.
Next we will make changes to our ConversionServerConfig.xml file.
- Go to the root of your instances Code tree and open the ConversionServerConfig.xml file
- Within the configSections tag under the sectionGroup ConverterSettings add the following tags:

- Within the Converters tag add the following tags:
- Within the ConverterSettings tags add the following as well:
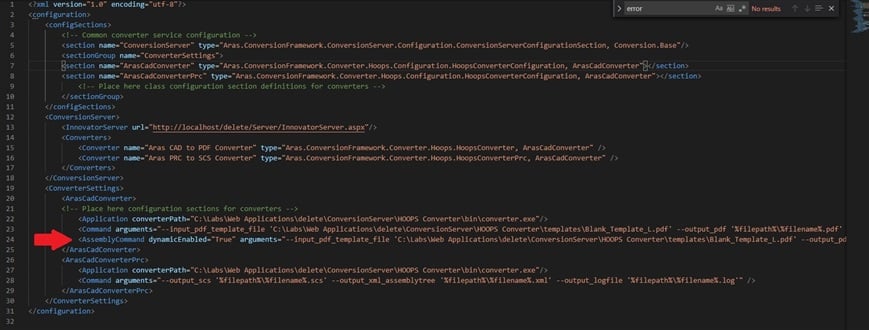
- Make sure however that both the converterPath attributes point to the correct location of the converter.exe. Should look like this with all the new changes:

Now we need to add our imports and codetree changes.
- Go to the instance version’s CD image (in my case the SP6 CD image) and within the utilities folder you will see a zip file called Aras CAD to PDF Converter.
- Unzip this file and within it there will be another zipped file called “ArasCadtoPdfConverter_x64”.
- Unzip this file and copy the ConversionServer folder to the codetree root instance to replace the current ConversionServer files.
- Before moving forward be sure to restart IIS.
- Next we need to import the database package that is included within the ArasCadToPdfConverter_x64 folder. Run the import tool from the CD image and add this package to the database.
- Last copy the HOOP Converter folder and to the ConversionServer folder and run another IISReset.
Setting up Dynamic Product Navigation:
Go back to your CD image and unzip the file in Utilities called ArasDynamicModelConstructor.
- Within this new folder there is an Innovator file, copy this file to your codetree, this will add the additional DLL’s to the current Innovator folder.
- Run an IISreset once again.
- Now we need to update the method-config.xml file located in the codetree > Innovator > Server folder.
- Within referenced assemblies we need to include the tag:
- Going back to the ArasDynamicModelConstructor folder we need to import these database files under the imports folder.
- Run the Aras import tool within the CD image again and point it to the import files.
- We will now need to update the ConversionServerConfig.xml file located in the codetree again.
- Within the ArasCadConverter tag we need to add the following:
- Once again be sure to change the value of the input_pdf_template to your instances ConversionServer folder and point it to that Blank_Template_L.pdf file.
- Your complete ConversionServerConfig.xml file should look like this:
- Completing our configuration we need to open up the InnovatorServerConfig.xml file and add another operating_parameter tag:
- Save, close and run another IISReset.
- Log into your instance and add the dynamic_enabler user (Alias Identity - DynamicEnabler User) as a member to the Aras PLM Identity. The dynamic_enabler user must have permission to update the CAD items.
- Now that we have created the dynamic_enabler user and set the password to innovator, we can log into our instance as Admin and go to the TOC > Administration > Users > and open up the dynamic_enabler user. Select the “logon enabled” to true, type in “innovator” for the password and hit done.
Wrapping Up:
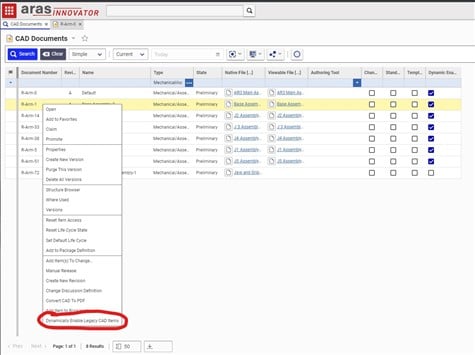
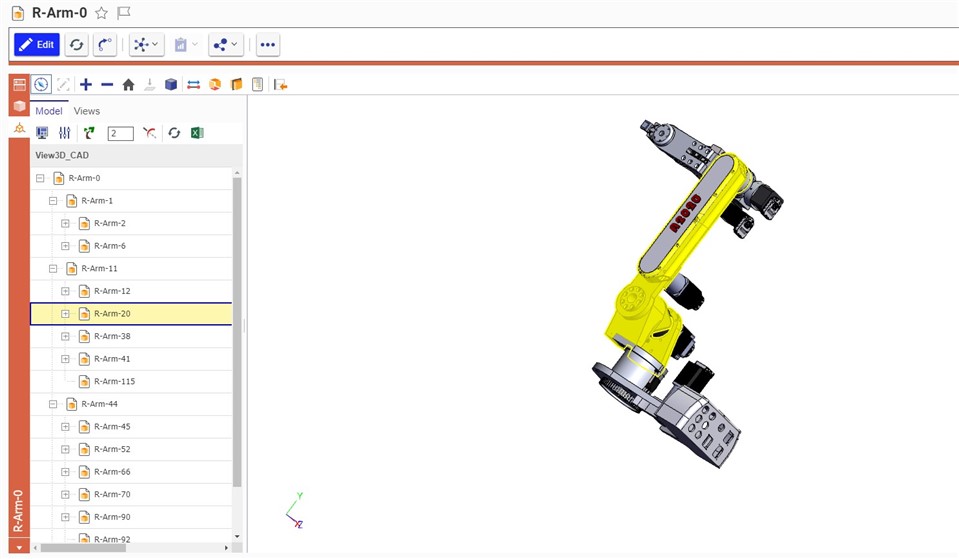
Now that we have configured our instance to run DPN, search your CAD Document Items for an assembly containing CAD files associated to each item. Within the search if you right click on the item you will have the option to "Dynamically enable legacy CAD items", select this action. Please note this action is only required on assemblies which do not have the Dynamic Enabled property flag selected. Assemblies saved/uploaded after the DPN conversion server setup will automatically have the required view files and receive the Dynamically Enabled flag after the conversion completes.
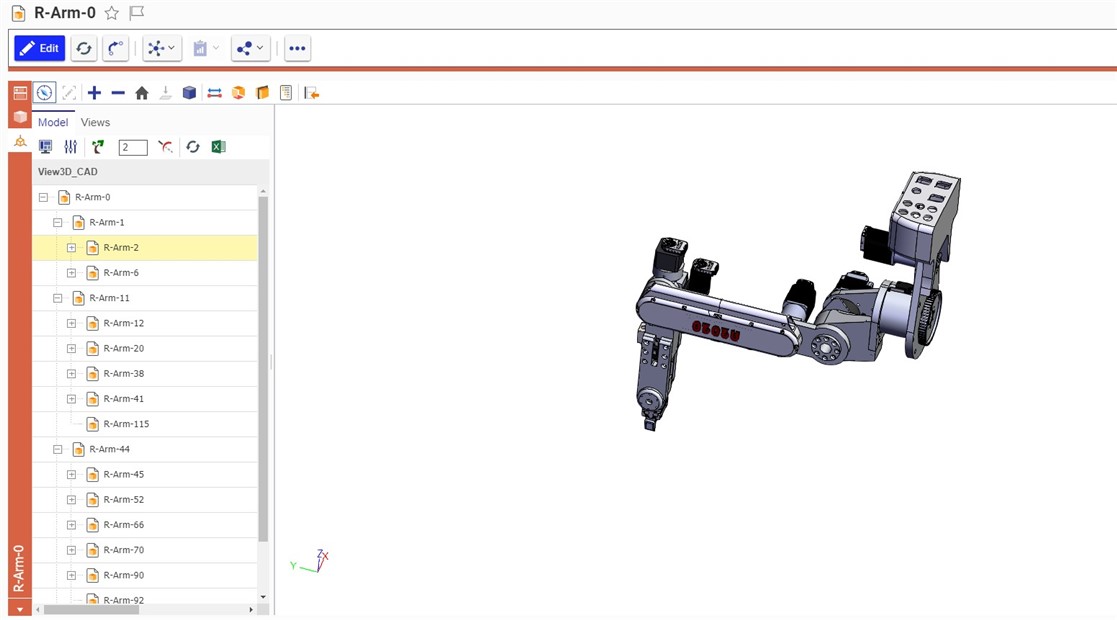
Once it runs you should be able to view your entire assembly and select individual parts to view in it as shown below:
Congratulations you are all setup. Comment on what you think about DPN and how this capability affects your business!