


This article will cover the creation of new ItemTypes, which is important for administrators as it allows Aras Innovator to be customized to your business needs. Today, we’re going to create a simple ItemType for Purchase Orders, but this same process can be used to create a wide variety of ItemTypes. We'll make the Purchase Orders, then set permissions for them and create a form so that users can add details. To follow along, you’ll need to be an administrator on your Aras Innovator instance. The screenshots and specific steps in this article were made using Aras Innovator Version 12 Service Pack 2, and while the steps should be similar for any Service Pack, you may notice small changes.
Creating the ItemType
To create a new ItemType, open up the table of contents and navigate to Administration > ItemTypes. If you click on ItemTypes and select “Create New ItemType” then you will be presented with the form, which should look much like it does below.
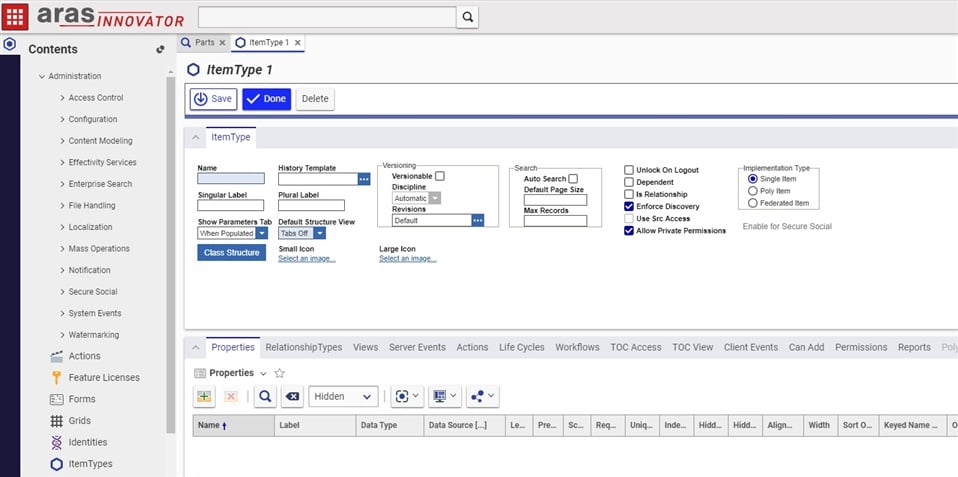
Aras allows you to configure ItemTypes in a great deal of detail, but today we’re going to focus on the basics. Since Name has a blue background, we know it's required, so we need to add a name before we can save. Let’s name this ItemType Purchase Order.
Since all our required fields have values in them, we could be done here, but there are a few things we'd like to to add before we do. You can see the two label fields- Singular Label and Plural Label. These get used in displays often and labeling them “Purchase Order” and “Purchase Orders” respectively will be helpful for our users. Similarly, we can choose an icon to represent Purchase Orders. Aras Innovator has a number of these preloaded, or you can add new images.
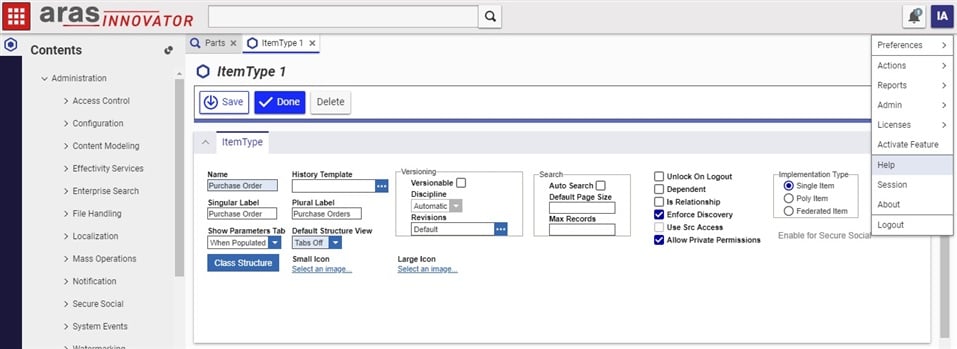
If you want more details on anything here, look at the Just Ask Innovator database, found under Help if you click your initials at the top right.
Adding Properties
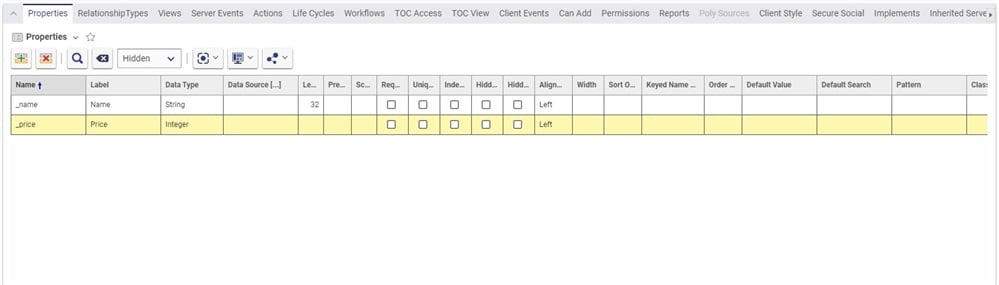
Before we save, we want to add a couple of properties. Properties are useful for containing discrete pieces of information associated with an ItemType. One very common property is a Name. For Purchase Orders, we might also want to keep track of the Price. The steps to add a new property are as follows:
- Go to the Properties tab in our Purchase Order ItemType.
- The button to add a new row is at the top left, and looks like this
 Click it. Aras Innovator will jump down to the property we’re creating at the first column.
 - Enter the “_name” property. We don’t have to start with the underscore, but it’s useful to have some way to distinguish between properties that the system made and properties that we made. Underscores are one way to do this.
- Click on the Label column to the right of Name. Labels are intended to be something more human readable; in this case, type Name.
- Click on the Data Type column to the right of Label. We want to store a short bit of text in this, which means we could use either the Text datatype or the String datatype, but we want to use String. Without going into much depth, the Text datatype is for much longer sequences, things on the order of a newspaper article- or a blog post! Strings have lengths, and thirty-two characters seems long enough for the name of a Purchase Order.
We also want a Price property in our Purchase Orders. We can repeat the process we used before; make a new row, enter something like “_price” for the name of the property, “Price” for the label, and this time giving it the DataType of Integer. Now you understand how to make properties and can add as many as you need. Or more than you need. We're not going to stop you.
For now, let’s hit Save. Once we do, Aras Innovator will set up the ItemType for use, including adding system properties and creating a form with the custom properties we just added.
Making Sure Everyone Has Access
After a moment, Aras Innovator will finish creating a number of system properties that every ItemType has, as well as making things like the associated form. Once that’s finished, we can customize our Purchase Orders.
If we open our table of contents and scroll down to the bottom where new ItemTypes default to, we don’t see them. That’s because we haven’t configured who is allowed to use them yet. For that, go back to our Purchase Order ItemType. In the tabs below, there are three that we need to make changes to: TOC Access, Can Add, and Permissions. Lets start with the TOC Access tab.
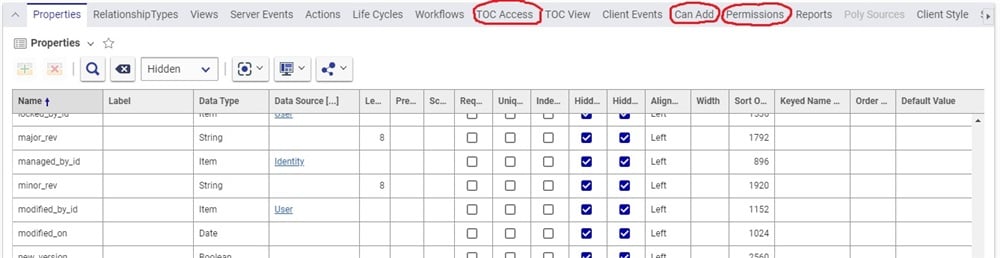
We need to choose some identities that have access to view and use this ItemType. You’ll want to be more specific with what users and user groups you’ll allow, but for the sake of demonstration we can use the World identity, which will allow every user to interact with the Purchase Orders. To do this, follow the following steps:
- Click on the relevant tab. (TOC Access or Can Add.)
- Select new Identities with the select icon, which looks like this

- Under Name type “World” and press enter.
- Left click the resulting row
- Click OK to select it.
In TOC Access, we also want to set the Category. This will control what folder Purchase Orders will be in on the Table of Contents. We'll use Documents for now, but as long as your structure makes sense to you it can be in any folder.
The Can Add tab is laid out the same way, and we can repeat those steps to give the World identity (a category containing every user) the ability to add Purchase Orders. We don't need to set a category in Can Add.
We’re also going to need permission to see, edit, and if needed delete Purchase Orders. For now, the Default Access permissions will do well. Adding Permissions is slightly different than adding to Can Add or TOC Access.
- Click on the Permissions tab
- Select new Identities with the select icon.
- Under Name type Default Access and press enter
- Left click the resulting row
- Click OK to select it.
- Next to Default Access in the Permissions area, there's a checkbox next to Is Default. Check it.
You'll notice that this is very similar to the process for adding Can Add or TOC Access, except for the last step. Once you’ve clicked Save, we should now see Purchase Orders available in the Documents folder in the Table of Contents, right where it should be.
We can right click on it and create a new Purchase Order if we want. Doing so though, we now are shown a form with the Save, Done, and Discard options above, and our Name and Price fields where we can type in the right values for those. Our Purchase Orders are now ready for use!
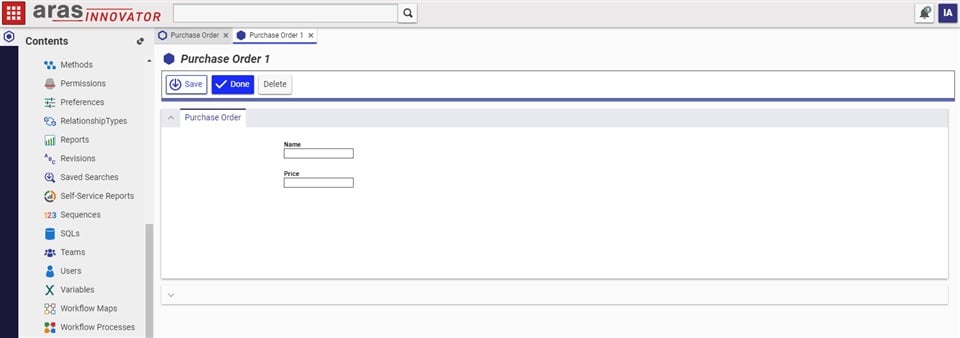
From here, you can fill in values for Name and Price, the two properties we created earlier. Aras Innovator automatically added them to the form, saving us a bit of time!
Congratulations and Conclusions
Congratulations! If you’ve been following along, then you’ve made your first ItemType, granted access to those who need it, added a pair of custom properties, and lastly created an instance of that ItemType. While you would want to add more detail to a Purchase Order in your organization, as well as take more care with who was granted permission to use them, you would follow the same steps we used today.
If you have more questions, feel free to get in touch in the comments below this article. Good luck, and happy customization!